A lot of people are flummoxed when they first open a Squeak image, especially developers who want to just get on and write some Smalltalk code. This guide should help you get over that first hump. To start off, I'll assume that you've got a Squeak image running and you're looking at a screen wondering what to do now!
First, for this exercise, you can close any windows in Squeak by pressing on the 'X' on the title bar, or minimise them by pressing on the 'O'. Once you've cleared a little space, click on the Squeak desktop to bring up the 'World Menu':
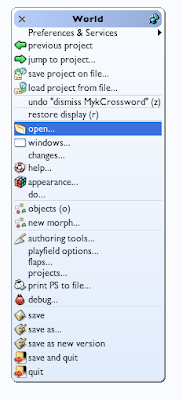
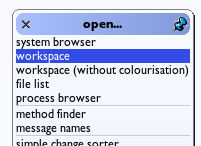
Clicking on the 'open' item brings up a useful menu showing lots of interesting tools that you can open. It's worth coming back to this menu to investigate all these tools, but for now we're interested in opening a 'system browser', so click on that:
This brings up the system browser; most of your code creation and editing will happen here. It has lots of powerful features - try right-clicking on the various panes to get an idea of the functionality it exposes. The left-hand pane shows 'Categories' (kind of like packages or modules in other languages). Clicking on a category shows all the classes in that category.
Let's create a new category for our code to go into. Right-click on the categories pane (the left-hand pane) to bring up its menu, then click on 'create category...':
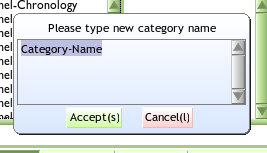
This brings up a 'Fill-In-The-Blank' menu, which waits for you to enter a value:
Here, I've entered 'MyTestCategory':
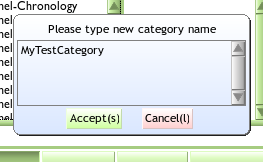
Clicking the Accept button will commit this name (the (s) on that button indicates that pressing (Ctl-s will have the same effect). You will then see that your new category has been added at the bottom of the Categories pane (if a category with that name already existed, you'll be shown that category and its contents - it's best to avoid adding classes into pre-existing categories until you know what you're doing).
The large 'code pane' at the bottom of the window has also been pre-populated with a 'class creation template':
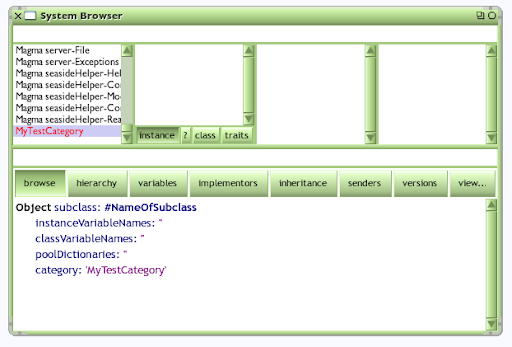
Editing this pane will allow us to create a new class and define its instance- and class- variables. For the moment, let's just create a simple class; leave the template unchanged except for replacing NameOfSubclass with the name of the class you want to create. Note that this means that your new class will be a subclass of Object, with no instance or class variables, created in the 'MyTestCategory' category:
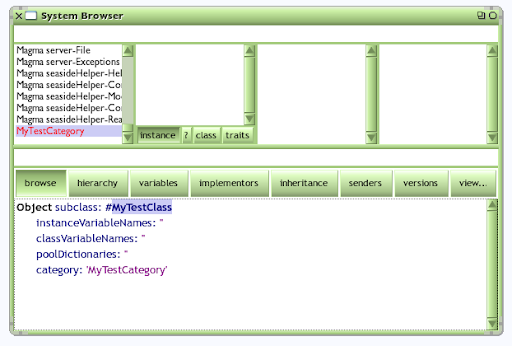
Pressing Ctl-s will accept this change. If you've picked a name that is already used in Squeak, you will get an error message, and you should cancel and try again. Once you've settled on a unique name, you will see your new class appear in the classes pane. Make sure that the 'instance' button is selected (the other buttons show class comments; class methods; and any traits of the class -- all beyond the scope of this simple introduction):
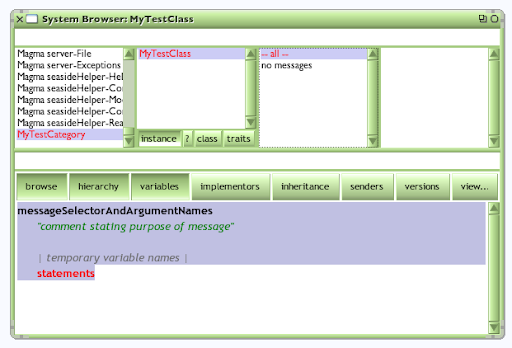
You can now add a method to your class by clicking on '--all--' in the messages pane (a 'message' being the Squeak equivalent of a 'method' in other languages). This brings up a 'new method template' in the code pane, which shows the four key elements of a method definition: its name, a comment, its local variables, and some code statements (as below). If your code pane doesn't look like this, try clicking on '--all--' again -- editing before this text has appeared means that you're not editing method text, and you will get an error when you try to save.
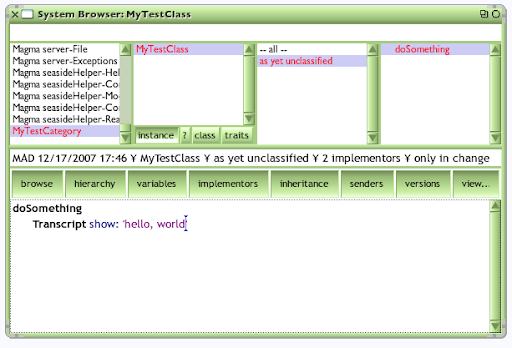
Replace the template code with your own code. The code below defines a method called 'doSomething' that will print out a helpful and informative message on something called the Transcript. Press Ctl-s to accept the code, and you will see the method appear in the methods pane on the right-hand side. The third pane allows you to organise your methods into useful groupings, but as we've not done this, our method is identified as being 'as yet unclassified':
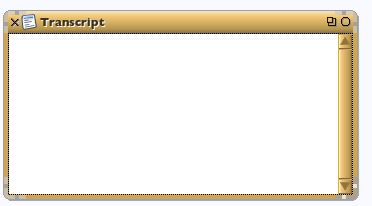
Let's make a Transcript window for our output. Open the World menu, select the Open sub-menu and click on transcript, and a Transcript window will appear:
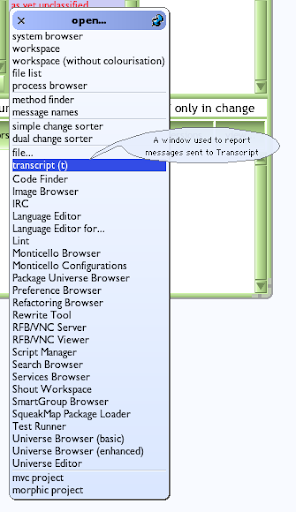
A Transcript is a simple logging window, often used to capture debugging information, and is where our class will send its output:
Now we want to call our class' method. First create a workspace, which is where you can execute Squeak code:
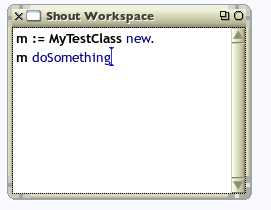
We can now create a new instance of your class, by sending the message 'new' to the class, and hold the resulting instance in the variable 'm'. Note the final '.' which is Squeak's statement separator. Press ctl-d (to Do-it):
To call the method on our new instance, type in 'm doSomething' and then ctl-d to execute it:
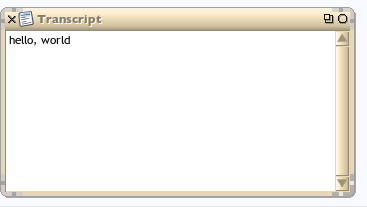
And there you go; you've created a class, created an instance of that class, and sent a message to that class, resulting in some visible output:
You might like to open the World menu again, and click on 'save' to keep hold of this valuable code.
Monday, 17 December 2007
Saturday, 1 December 2007
How to use decorator WAFormDecoration
This is a very simple example of how to use a decorator in Seaside, based on my understanding from two blogs. A decorator allows you to wrap standard functionality around the content generated by your component, so hiding a lot of the 'boilerplate' complexity otherwise required. This example allows you to build up a form with buttons of your choice; provide a list of buttons, and a matching method for each.
You need to ensure that you have a very recent (533 or later) version of Seaside for the defaultButton behaviour to take effect correctly. If you're using multiple decorators, don't forget to make the FormDecoration the last one you apply.
WAComponent subclass: #SimpleTestForm
instanceVariableNames: ''
classVariableNames: ''
poolDictionaries: ''
category: 'Sample'
initialize
| form |
super initialize.
form := WAFormDecoration new buttons: self buttons.
self addDecoration: form.
buttons
^ #(okay cancel)
okay
"your action goes here"
self inform: 'you pressed okay'
cancel
"your action goes here"
self inform: 'you cancelled'
defaultButton
^ self buttons first
renderContentOn: html
"usual form contents go here"
html textInput.
html text: 'asd'
"etc"
Friday, 13 July 2007
Morphic development tutorial
Stephen Wessels has put together a very thorough development tutorial at http://squeak.preeminent.org/tut2007/html/index.html
It's aimed at new Squeakers and introduces and explains the main elements of the development environment, as well as giving an insight into areas such as test-driven development, object-oriented design, and code refactoring.
Wednesday, 23 May 2007
Sending mail from your Seaside application
There's a very useful step-by-step guide on how to send emails from your Seaside application at saush.com, which also documents an experienced developer's first experiences with Squeak. All good stuff.
Tuesday, 8 May 2007
Simple Seaside & Magritte application
Ramon Leon continues his excellent series of blog posts on Squeak - this time to note his creation of a sample application demonstrating how to build a simple application using Seaside and Magritte.
This is a great introduction to building a web application using these tools, and I found it a useful exercise to see how Ramon dealt with some of the common tasks involved in such an application: persistence, user session management, and controlling application flow.
Friday, 30 March 2007
Golden nuggets
There's a lot of useful discussion going on over the seaside mailing list at the moment, triggered off by a question from Andreas Raab asking about some of the mechanics of Seaside. Some key points that were interesting to me:
All of which was followed by a general lament at the state of documentation for Seaside...
A component is responsible for generating a part of the html of a "page". This includes forms, since they are part of html (note that you must not nest forms, forms really suck in html). The (visible) part inside the <body> is generated in #renderContentOn:. The part in the <title> is generated in #updateRoot: (create your metas here).
...
CSS depends on your needs. There are about three different ways for different situations. In general you assign the correct classes and ids to your html elements and the CSS comes from "somewhere" outside. You will have to write your CSS by hand (or let it write) Seaside doesn't help you there. It just gives you a choice where to put it.
...
Seaside doesn't have "special rules" but it does (by default) use a convention to make this stuff a little safer. Normally, the transition from one page to another is split into two request-response cycles. The first triggers the callbacks associated with the link or form elements, and Seaside sends back a 302 response, redirecting the browser to another url. The second request triggers no callbacks and is a "pure" HTTP GET. Seaside sends back an html representation of the page in its new state. That page can be reloaded as much as you like with no side effects.
...
Basically, since Seaside is component based anyway, many people build a root component to contain header, footer, menus, etc, and then a component for body. You can then set the body component to any component you like and it'll render, no need for call. As Goran said, the component model is what makes Seaside rock so much, it's just like programming a desktop application, no fussing with state.
...
#call: is useful when you want to be able to switch a component in the page layout, in place, with zero effort [and] we are in direct control of the component's composition. #call: is a lower-level framework feature. For example, [in] this callback:
html anchor
callback: [counters atRandom call: WAMiniCalendar new];
with: 'Call component at random'.
we #call: one of the components. The effect of this is to show the mini calendar in place of one of the counters. We have not had to say anything else to achieve this, and get #answer support, back button support, etc.
...
In retrospect the main benefit, as I see it, of Seaside in Gjallar is the component model. The fact that I can construct the UI using separate components that can be used embedded inside each other and still render themselves totally oblivious of the environment and the request/response cycle.
The reason for this is of course the fact that a WAComponent is "persistent" in the user session and can hold all its state simply in instvars. So it erases the need for "inter request client side state management" using say URL params or hidden fields and so on.
All of which was followed by a general lament at the state of documentation for Seaside...
Saturday, 17 February 2007
A new GUI builder for Morphic
A few weeks ago I posted a comment to the squeak-dev mailing list bemoaning the current state of UI support in Squeak. My concerns were:
Well, it looks as though half of my dream has come true! Noury Bouraqadi has published details of his Easy Morphic GUI, which allows you to build up the GUI for a Morphic application, and some of the event handling, using a drag and drop interface. It requires your parent morph to be a subclass of his EMGGuiMorph, but will accept any morphs from the Parts Bin.
This may well inspire me to try to build a few UI elements with a more conventional look and feel.
Most of [the many GUI-builders in Squeak] are incomplete, out-of-date, and abandoned; but they show that developers are repeatedly coming back to a need to find an easy way to create and manage a user interface that employs the metaphors that have become familiar to most desktop users. Not a "Windows clone", but perhaps something like Tk or Swing Metal -- familiar enough, but not tied to the platform -- and not requiring extra installation above and beyond the Squeak VM & image.
After looking at the options (and trying unsuccessfully to make prefab usable for me), I gave up! I'm now using Seaside to build the UI for my applications. This isn't a perfect answer, in fact using a complex mix of HTML CSS and JS to replicate a rich client interface is pretty
mad, but it quickly gives me a user interface that is familiar and can be layed out quickly and easily.
If I had access within Squeak to a full set of UI widgets that had a consistent look and feel, were more 'mainstream', and preferably came with builder tools (perhaps Magritte with layout hinting), I'd love to have the power of Morphic under the covers, but as it is, Seaside is
the best game in town.
Well, it looks as though half of my dream has come true! Noury Bouraqadi has published details of his Easy Morphic GUI, which allows you to build up the GUI for a Morphic application, and some of the event handling, using a drag and drop interface. It requires your parent morph to be a subclass of his EMGGuiMorph, but will accept any morphs from the Parts Bin.
This may well inspire me to try to build a few UI elements with a more conventional look and feel.
Friday, 16 February 2007
Sample Image Viewer - a simple SystemWindow application
One of the problems I, and many other beginners, had when coming to Squeak was in building a GUI for my application. There are many half-built and unmaintained GUI builders out there, but most of the core Squeak applications are built manually using SystemWindow. Although these are thought of as self-documenting, I found it difficult to see the wood for the trees when examining them.
My first experiment was to build a simple Image-viewer application, which demonstrates how to build a SystemWindow-based application, how to access the file system and how to interact with the user.
It's packaged up as a Monticello package. If this is not something you've used before, have a look at the Wiki notes page, which gives full instructions on how to download using Monticello.
Wednesday, 14 February 2007
Good (though old) lecture notes on Smalltalk
I've just found a link from the Squeak wiki to a set of lecture notes from Ralph Johnson (one of the Design Patterns "Gang of Four") on Smalltalk (based on VisualWorks, though he has since migrated to Squeak):
http://st-www.cs.uiuc.edu/users/johnson/cs497/notes98/online-course.html
The lecture notes are accessible, but the video links aren't as they're copyrighted by the university. If you're interested in finding the videos, you could try searching the squeak beginners' mailing list to find a reference...
http://st-www.cs.uiuc.edu
The lecture notes are accessible, but the video links aren't as they're copyrighted by the university. If you're interested in finding the videos, you could try searching the squeak beginners' mailing list to find a reference...
Wednesday, 7 February 2007
anObject select: #aMethodName considered harmful
I was browsing some of the Magritte source code, when I saw a message that confused me:
A posted a question to the Squeak-Beginners mailing list, and very quickly got some good feedback. Ron Teitelbaum gave a full explanation:
selectors := anObject class allSelectorsI couldn't understand how you could pass a Symbol to #select: instead of a block-- certainly the definition of Collection>>select: implies it should only take a block. But trying it for myself, I saw it worked-- eg
select: #isDescriptionSelector.
{ 1. 2. 3. 4. } select: #even.can be used in place of:
{ 1. 2. 3. 4. } select: [ :each | each even ]Given how much simpler this looks, I was surprised I'd not seen this usage before, and searching for senders of #select: shows that the wordier version seems to be generally preferred. So what's this all about?
A posted a question to the Squeak-Beginners mailing list, and very quickly got some good feedback. Ron Teitelbaum gave a full explanation:
It's a trick. It only works because #value: is implemented on symbol as:Lukas Renggli-- the author and maintainer of Magritte-- also responded, echoing Ron's comments, and adding that the latest versions of Magritte no longer use this idiom, so this is possibly the first and last place you will ever see this idiom used!Symbol>>value: anObjectSo the following works too.
^anObject perform: self.#asUppercase value: 'I am a trick'My suggestion is that you shouldn't follow such tricks. Although I do it too sometimes with things like:aDictionary at: #foo ifAbsent: nil.Since nil responds self to #value it seems redundant to me to put the nil in a block so that it can return nil when the block is evaluated with #value. Even though in this case the execution is faster but in the case of sending a symbol to select it is slower.
In both cases it is harder to read so in my opinion it is best to stick with arguments that are expected.
Friday, 2 February 2007
Making sense of it all
I've been playing about with Magritte a bit more over the past couple of days, and I'm beginning to get a better understanding of it - I can build edit-forms and reports now. I can't quite see how readonly views work, but I'm sure I'll crack it eventually...
More impressive (to me anyway) is that I've found a couple of bugs in Squeak!
The Traits-Tests suite of tests leaves lots of classes like anObsoleteClassC3 hanging around very reluctant to leave again. I raised this on the squeak-dev list and was advised to raise it on Mantis (bug reporting tool). So my first Squeak bug has now been created.
I uncovered this issue because the Refactoring Browser started generating messages telling me that "AnObsoleteC3 class does not understand #directlyDefinesMethod". As I wasn't able to solve the underlying problem I fixed the symptoms instead, by amending the RB to ignore obsolete classes. I don't know how useful a fix this is, as the obsolete classes shouldn't be hanging around in such an offensive way, but it's my first Squeak bug-fix, and is now part of the RB codebase.
Tuesday, 30 January 2007
Useful quickstart for Magritte
Ramon Leon's ever-impressive blog has a great quick screencast introduction to Seaside and Magritte, and reading between the lines, it does appear that the approach that I described in my previous post is the right way to be thinking about the role of Magritte.
Magritte vs Seaside
I'm just starting to experiment with using Magritte and Seaside in Squeak, and it's proving to be interesting if slightly hard going!
I think where I've got to with Magritte is that it's best thought of as a tool for building "edit" screens for objects (a task that it does very effectively under Seaside), but if you're trying to do anything else with your object, then it's back to plain old Seaside!
What I was trying to do was to put Magritte descriptions on an object subclassed from WAComponent, to allow me to use asComponent addValidatedForm to edit the object, but also use renderContentOn: to display the object. However, Magritte relies on a number of introduced messages on Object that WAComponent defines independently.
What I've had to do is introduce a 'wrapper' object to handle the view. This seems a bit cumbersome, but I've had a look at another Seaside/Matisse application — Conrad, a conference attendee management application developed by Stéphane Ducasse — and that appears to be the approach that he took. "Appears to be" as I'm having the usual problem of working out which way is up when looking at new code!
Subscribe to:
Posts (Atom)