Sunday, 11 May 2008

Using OpenDBX with Squeak

A team of students from UTN (National Technological University in Argentina) co-ordinated by Estaban Lorenzano has just been doing some work on SqueakDBX, a package to allow Squeak to access OpenDBX functionality, which gives a lighter-weight alternative to ODBC for connecting to databases including Firebird, Interbase, MS SQL Server, MySQL, Oracle, PostgreSQL, SQLite, SQLite3 and Sybase.

This uses the FFI (Foreign Function Interface) package (available through Package Universe), and requires access to the libopendbx library. Now I had a bit of fun and games working out how to do this on Mac OS X, so here's the magic that worked for me.

Firstly, I was interested in using PostgreSQL to compare with the Squeak postgres support which is already installed on my machine. I downloaded the OpenDBX source -- it's a UNIX tool, so distributed as source needing compilation -- you open a Terminal and change into the newly downloaded directory, and execute configure command as directed by the README: ./configure --with-backends="sqlite3 pgsql", but in my case this barfed because it couldn't find my postgres libraries. This was solved by manually pointing to the postgres library and include directory, as follows:

CPPFLAGS="-I/usr/local/pgsql/include/" LDFLAGS="-L/usr/local/pgsql/lib/" ./configure --with-backends="sqlite3 pgsql"

You'll see that I also set things up for SQLite3 as it's installed by default on OS X, and is increasingly being used to hold configuration files in OS X and Firefox. I know that there's a SQLite3 package for Squeak already, but I thought it would be interesting to compare the two.

Anyway, the configure stage now worked perfectly, and sudo make install installed the libraries for me. All I needed to do now was make Squeak FFI see the libraries. Ha! After a lot of poking about, I found this email from Jon McIntosh, which advised that creating a symbolic link to the library "in the right place is helpful". Thanks for the pointer John, but where's the right place???

Well, after a bit of experimentation, I found that I needed to create the link in the Resources directory of  the SqueakVM package:

cd /Applications/Squeak/Squeak 3.8.18beta1U.app/Contents/Resources
ln -s /usr/local/lib/libopendbx.dylib opendbx

And that's it. I'm now able to access my PostgreSQL database with code like this:

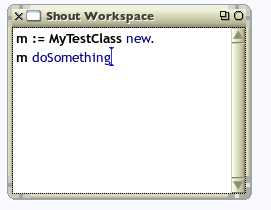
conn := DBXConnection new
backend: DBXBackend postgresql;
  connect: '127.0.0.1' port: 'x';
  open: 'x' name: 'x' password: 'x' method: 0.
  resultSet := conn query: 'select * from airline'.
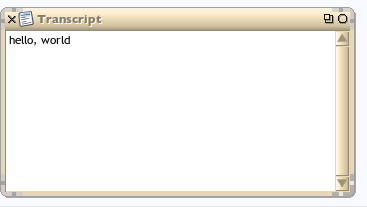
DBXTranscript show: resultSet.
conn disconnect.
Smalltalk garbageCollect.

It's still very early days for the project, and it is not yet production-ready, so I've not tried doing anything much with it, but I notice that Esteban and colleagues appear to be building in GLORP support from the outset, so it's worth keeping an eye on this project.

Thursday, 13 March 2008

Snippet: how to trigger events on a checkbox in Seaside

Richard Eng was having trouble using a checkbox to trigger a change in the contents of a textarea.

Lukas responded that:
To trigger a callback of a form element, you need to specify this form element with #triggerFormElement:. As the comment of this method says, this does not work for multi-select lists and checkboxes, as those two form elements internally depend on another hidden form element. So for your checkbox you need to trigger the whole form. Give it an (unique) id and use #triggerForm: with this id.
(my italics)

Gerhard Obermann kindly provided a working sample:

renderContentOn: html
"requires 'set' to be defined as an instvar"
| formId |
formId := html nextId.
html form id: formId;
with: [
html checkbox value: false; callback: [ :v | set := v ];
onClick: (
html updater id: 'text';
triggerForm: formId;
callback: [ :r |
set
ifTrue: [ r text: 'My address' ]
ifFalse: [ r text: '' ]]).

html textArea id: 'text';
with: [ html text: 'Empty' ]].
This was a great help to Richard, prompting him to ask why there isn't more information like this out there - much of what he found while teaching himself Squeak and Seaside was out-of-date and wrong. Maybe a snippets library would be a good starting point?

Monday, 17 December 2007

How to create a class in Squeak - an illustrated step-by-step guide

A lot of people are flummoxed when they first open a Squeak image, especially developers who want to just get on and write some Smalltalk code. This guide should help you get over that first hump. To start off, I'll assume that you've got a Squeak image running and you're looking at a screen wondering what to do now!

First, for this exercise, you can close any windows in Squeak by pressing on the 'X' on the title bar, or minimise them by pressing on the 'O'. Once you've cleared a little space, click on the Squeak desktop to bring up the 'World Menu':


Clicking on the 'open' item brings up a useful menu showing lots of interesting tools that you can open. It's worth coming back to this menu to investigate all these tools, but for now we're interested in opening a 'system browser', so click on that:


This brings up the system browser; most of your code creation and editing will happen here. It has lots of powerful features - try right-clicking on the various panes to get an idea of the functionality it exposes. The left-hand pane shows 'Categories' (kind of like packages or modules in other languages). Clicking on a category shows all the classes in that category.

Let's create a new category for our code to go into. Right-click on the categories pane (the left-hand pane) to bring up its menu, then click on 'create category...':


This brings up a 'Fill-In-The-Blank' menu, which waits for you to enter a value:


Here, I've entered 'MyTestCategory':


Clicking the Accept button will commit this name (the (s) on that button indicates that pressing (Ctl-s will have the same effect). You will then see that your new category has been added at the bottom of the Categories pane (if a category with that name already existed, you'll be shown that category and its contents - it's best to avoid adding classes into pre-existing categories until you know what you're doing).

The large 'code pane' at the bottom of the window has also been pre-populated with a 'class creation template':


Editing this pane will allow us to create a new class and define its instance- and class- variables. For the moment, let's just create a simple class; leave the template unchanged except for replacing NameOfSubclass with the name of the class you want to create. Note that this means that your new class will be a subclass of Object, with no instance or class variables, created in the 'MyTestCategory' category:


Pressing Ctl-s will accept this change. If you've picked a name that is already used in Squeak, you will get an error message, and you should cancel and try again. Once you've settled on a unique name, you will see your new class appear in the classes pane. Make sure that the 'instance' button is selected (the other buttons show class comments; class methods; and any traits of the class -- all beyond the scope of this simple introduction):


You can now add a method to your class by clicking on '--all--' in the messages pane (a 'message' being the Squeak equivalent of a 'method' in other languages). This brings up a 'new method template' in the code pane, which shows the four key elements of a method definition: its name, a comment, its local variables, and some code statements (as below). If your code pane doesn't look like this, try clicking on '--all--' again -- editing before this text has appeared means that you're not editing method text, and you will get an error when you try to save.


Replace the template code with your own code. The code below defines a method called 'doSomething' that will print out a helpful and informative message on something called the Transcript. Press Ctl-s to accept the code, and you will see the method appear in the methods pane on the right-hand side. The third pane allows you to organise your methods into useful groupings, but as we've not done this, our method is identified as being 'as yet unclassified':


Let's make a Transcript window for our output. Open the World menu, select the Open sub-menu and click on transcript, and a Transcript window will appear:


A Transcript is a simple logging window, often used to capture debugging information, and is where our class will send its output:


Now we want to call our class' method. First create a workspace, which is where you can execute Squeak code:


We can now create a new instance of your class, by sending the message 'new' to the class, and hold the resulting instance in the variable 'm'. Note the final '.' which is Squeak's statement separator. Press ctl-d (to Do-it):


To call the method on our new instance, type in 'm doSomething' and then ctl-d to execute it:


And there you go; you've created a class, created an instance of that class, and sent a message to that class, resulting in some visible output:


You might like to open the World menu again, and click on 'save' to keep hold of this valuable code.

Saturday, 1 December 2007

How to use decorator WAFormDecoration

This is a very simple example of how to use a decorator in Seaside, based on my understanding from two blogs. A decorator allows you to wrap standard functionality around the content generated by your component, so hiding a lot of the 'boilerplate' complexity otherwise required. This example allows you to build up a form with buttons of your choice; provide a list of buttons, and a matching method for each.

You need to ensure that you have a very recent (533 or later) version of Seaside for the defaultButton behaviour to take effect correctly. If you're using multiple decorators, don't forget to make the FormDecoration the last one you apply.

WAComponent subclass: #SimpleTestForm
instanceVariableNames: ''
classVariableNames: ''
poolDictionaries: ''
category: 'Sample'

initialize
| form |
super initialize.
form := WAFormDecoration new buttons: self buttons.
self addDecoration: form.

buttons
^ #(okay cancel)

okay
"your action goes here"
self inform: 'you pressed okay'

cancel
"your action goes here"
self inform: 'you cancelled'

defaultButton
^ self buttons first


renderContentOn: html
"usual form contents go here"
html textInput.
html text: 'asd'
"etc"

Friday, 13 July 2007

Morphic development tutorial

Stephen Wessels has put together a very thorough development tutorial at http://squeak.preeminent.org/tut2007/html/index.html

It's aimed at new Squeakers and introduces and explains the main elements of the development environment, as well as giving an insight into areas such as test-driven development, object-oriented design, and code refactoring.

Wednesday, 23 May 2007

Sending mail from your Seaside application

There's a very useful step-by-step guide on how to send emails from your Seaside application at saush.com, which also documents an experienced developer's first experiences with Squeak. All good stuff.

Tuesday, 8 May 2007

Simple Seaside & Magritte application

Ramon Leon continues his excellent series of blog posts on Squeak - this time to note his creation of a sample application demonstrating how to build a simple application using Seaside and Magritte.

This is a great introduction to building a web application using these tools, and I found it a useful exercise to see how Ramon dealt with some of the common tasks involved in such an application: persistence, user session management, and controlling application flow.